As most of the world turned to indoor activities during the quarantine, my husband and I embarked on a journey to transform an ordinary wall into a piece of art. We dedicated our newfound free time to add a touch of elegance and charm to our dining room, and the results were nothing short of amazing. Here's how we brought our accent wall vision to life:
The first step towards a successful project is thorough planning.
1. Planning
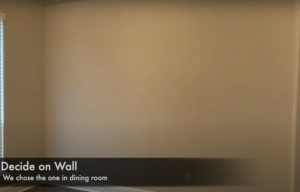
a) Choosing the Wall: The dining room wall was our canvas.
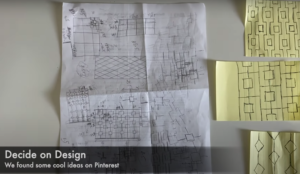
b) Design Inspiration: Our muse was a design we stumbled upon on Pinterest.
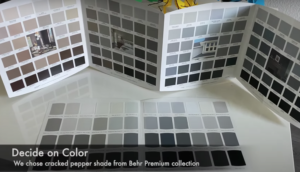
c) Color Selection: 'Cracked Pepper' from Behr was the perfect shade for our vision.
2. Layout
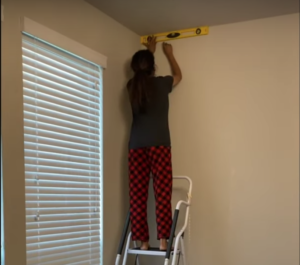
We began by measuring the dimensions of the wall and sketching a rough plan on paper. This sketch was then translated onto the wall as an outline to guide our work.
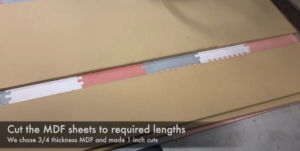
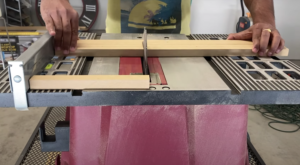
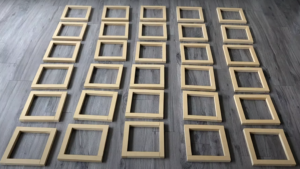
3. Cutting the Wood:
The 3/4 inch thick MDF was precisely cut into 1-inch wide strips using our trusty table saw. These strips were further cut down to 1-foot lengths.
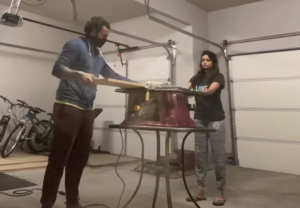
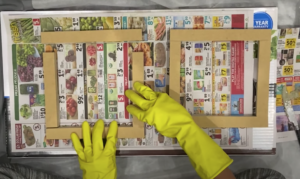
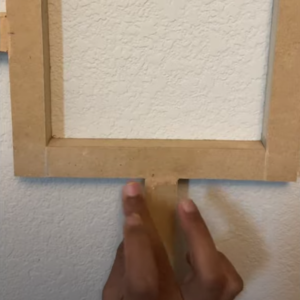
4. Constructing the Squares:
The strips were assembled into squares using Liquid Nails. This adhesive ensured the structures were sturdy and durable.
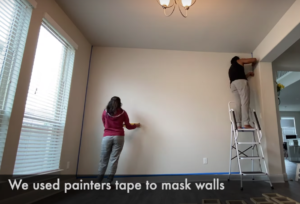
5. Preparing the Wall:
To avoid any unintended paint marks, we masked the adjoining walls with painter's tape.
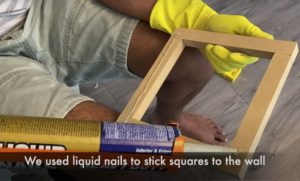
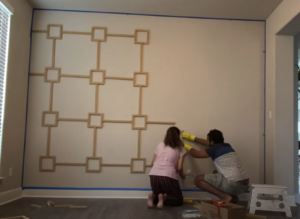
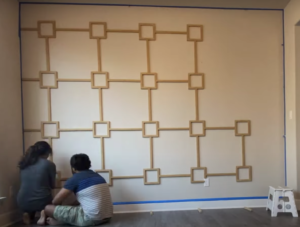
6. Installing the Square Panels:
a) Using Liquid Nails, we began attaching the squares to the wall.
b) The leveller was our best friend here, ensuring each square was perfectly aligned. The mantra was simple: Check the level, stick, and repeat.
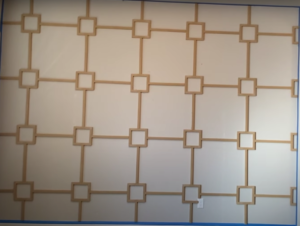
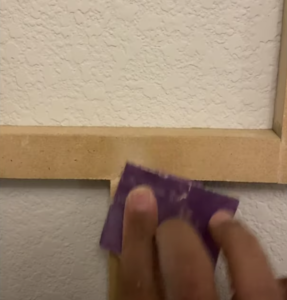
7. Finishing Touches:
Any gaps or imperfections between the squares were meticulously filled with wood filler. Once it dried, we sanded the surface to achieve a seamless finish.
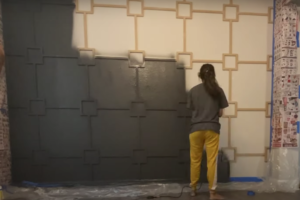
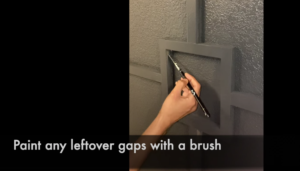
8. Painting:
The transformation was almost complete! We used the paint sprayer to uniformly coat the squares, ensuring a smooth finish. The corners and edges were carefully painted with a brush.
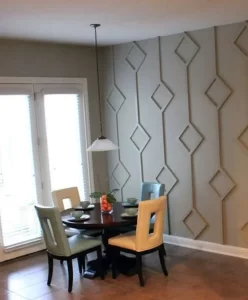
The end result was a captivating accent wall that not only added character to our dining room but also became a testament to what one can achieve with some dedication and creativity. It was a rewarding experience and a beautiful addition to our home. If you're looking to elevate a room in your house, this is a project I wholeheartedly recommend!