DIY Rain Curtain: Our Backyard Water Feature Transformation
Hello to all my wonderful readers! We've recently given our backyard a stunning makeover, and I'm super excited to share the transformation with you. While I'll be detailing our paver patio and swings in another post, today's focus is on our unique rain curtain water feature.
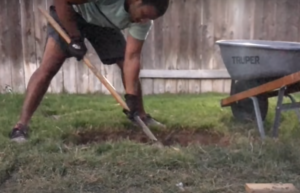
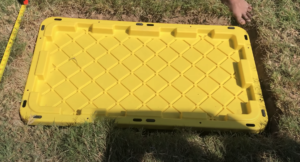
1. Preparation and Setting up the Water Reservoir:
To begin, we had to dig a hole to accommodate the water reservoir. The key here was to ensure the size was perfect for our storage bin from Home Depot, which would serve as our reservoir. This bin will store the water, which is then circulated using a pump.
2. Building a Frame for the Water Feature:
Our next task was to construct a frame that would act as the backbone for our water feature. Unlike standard beams, we chose hollow ones to let PVC pipes pass through them. After marking the desired spots, we began digging holes to anchor the frame. For this process, we used pressure-treated 2x4s and ensured everything was perfectly aligned using a post level tool.
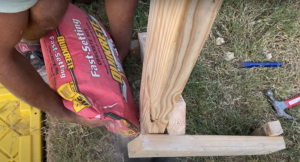
After aligning, we fortified the frame with additional support to make sure it remained steady when we added concrete. Our choice was a fast-setting concrete, which solidified in just about 20 minutes.
3. Crafting the Outer Frame:
The outer frame was crafted from 1-inch thick pressure-treated lumber, cut as per our dimensions. We then fixed these planks onto the previously built support frame.
4. Installing the PVC Pipe for Water Flow:
We opted for a 1-inch width PVC pipe to circulate the water. Holes were drilled half-inch apart using a 9/64 diameter drill bit to ensure water flow. After drilling, we used PVC primer and glue to join the sections. The primer was allowed to set for a few minutes before we layered the glue. To secure the pipe, we used clamps. The upper end of the pipe was closed, creating an 'L' shape.
5. Adding LED Lights for the Extra Shine:
What’s a backyard makeover without some glow? We adorned our water feature with outdoor waterproof LED strip lights. These lights come with an easy-to-use peel and stick feature. Just a heads-up, always ensure that the adapters and connectors are waterproof!
6. Water Drainage and Pump Connection:
Drainage is essential to maintain the feature's longevity. We drilled holes on the top of our reservoir bin. The pipe was then connected to the pump, and clamped for a tight fit. We placed the pump inside the bin, filling it with water.
7. Finishing Touches:
The last step was sliding in the final plank and fixing it with a screw from the rear, ensuring we can access it later if needed. After this, we painted our structure and decorated it with aesthetic stones.
The culmination of our hard work was a mesmerizing rain curtain that not only adds beauty to our backyard but also a serene auditory experience.
I'm thrilled with how our backyard looks now. If you've any queries or need clarification on any step, please drop a comment below. Thank you for being a part of our backyard transformation journey!